Gamers: Confirm Drift in 60s, Then Test, Clean, Upgrade Your Controller
Confirm the drift in under 60 seconds using a controller tester or your platform’s calibration screen, then work two quick fixes: a firmware update with recalibration, and widening the dead zone. If those readings still show non-zero movement at rest, clean the stick base with compressed air and isopropyl. Replace the module only after cleaning fails, and check your warranty status before opening anything.
TL;DR:
- Software fixes like recalibration and dead zone adjustments resolve most drift issues, but increasing dead zones long-term indicates hardware degradation.
- Cleaning the stick base with compressed air and high-concentration isopropyl often restores proper function, especially on controllers older than a year.
- Persistent or quickly recurring drift after cleaning signals worn potentiometers requiring module replacement, ideally with Hall-effect or TMR sensors for longevity.
- Checking warranty status before attempting DIY repair is crucial, as opening the controller typically voids coverage, making professional repair preferable.
- Re-test after any fix by measuring the at-rest offset numerically across multiple sessions to confirm if the problem is truly resolved.
Table of Contents
- How Do You Confirm and Measure Stick Drift?
- Try Recalibration, Firmware Updates, and Dead Zone Fixes First
- When Should You Clean the Stick Base?
- Do You Need a Full Module Replacement?
- Should You Repair, Replace, or Claim Warranty?
- What Should You Look For in a Repair Service?
- What the Evidence Says About Doing This Right
- The Fix Ladder Works, But Most People Skip a Rung
- Get Your Controller Fixed Without the Guesswork
- Sources
- FAQ
How Do You Confirm and Measure Stick Drift?
Stick drift isn’t always obvious. Sometimes it’s a slow camera creep in a shooter; other times it’s a character walking into a wall on its own. Before you touch a screwdriver or download anything, you need a number, not a feeling.
The fastest confirmation method is a browser-based tester like JoyCheck, which reads raw hardware input directly from your controller and reports an at-rest value. Platform calibration screens work too: PS5’s is buried in Settings under Accessories, Xbox uses the Accessories app, and Steam has its own controller test layout under Big Picture Mode.
Here’s the exact process:
- Set the controller down, hands off, and open a stick tester or calibration screen.
- Watch the on-screen dot or axis reading while the stick sits untouched.
- Note the at-rest offset on whatever scale the tool uses (JoyCheck and similar tools typically read on a 0.00 to 1.00 scale per axis).
- Repeat the test three times: right now, after 10 minutes of normal use, and again after a full play session.
Pro Tip: Measure the offset numerically instead of trusting your gut. A short reading captured before and after a fix is the only way to know if the fix actually worked or if you’re just imagining improvement.
An at-rest reading that sits near zero and stays there across all three passes means you’re likely dealing with a one-off software glitch or a dirty contact, not worn hardware. A reading that drifts noticeably and returns after cleaning points toward a mechanical problem inside the stick module. This three-pass cadence matters because drift often appears intermittently before it becomes constant, and testing only once can give you a false negative.
Try Recalibration, Firmware Updates, and Dead Zone Fixes First
Software fixes cost nothing and take a few minutes. A five-step fix ladder moving from cheapest to most invasive resolves the majority of drift cases before anyone reaches for a screwdriver, and recalibration sits at the top of that ladder for good reason.
On PS5:
- Go to Settings, then Accessories, then Controllers.
- Select “Calibrate Stick Centering” and follow the on-screen prompts.
- Check for a system update first (Settings, System, System Software Update) since Sony has patched drift-related firmware bugs in past updates.
On Xbox:
- Open the Xbox Accessories app on console or PC.
- Select your controller, then “Firmware Update” if one is pending.
- Use the same app’s calibration tool to remap stick center and range.
On PC and Steam:
- Open Steam Input settings for the controller (works for Xbox, PlayStation, and generic pads).
- Run the calibration wizard, which recenters the stick and lets you set a custom dead zone per axis.
- For controllers outside Steam’s native support, DS4Windows offers similar dead zone and calibration controls for DualShock and DualSense pads.
Dead zone adjustment deserves its own explanation because it’s the fix most players reach for first and misunderstand. Increasing the dead zone tells the software to ignore a wider radius of stick movement around center, which hides small drift readings. It’s a real fix for playability, but it’s a workaround, not a repair. Widening the dead zone doesn’t touch the worn component causing the offset, it just tells the game to ignore it.
That tradeoff has a real cost: a wider dead zone reduces sensitivity, which matters in games where fine aim adjustments decide fights. If you find yourself increasing the dead zone every few weeks to keep the drift invisible, that’s a signal the underlying hardware is degrading, not stabilizing, and you’re on borrowed time before cleaning or replacement becomes unavoidable.
When Should You Clean the Stick Base?
Cleaning is the highest-success noninvasive fix for drift caused by dust, oxidation, or grime inside the potentiometer housing, and it should happen before you consider disassembly. Cleaning with compressed air and high-concentration isopropyl resolves a large share of drift cases that software fixes couldn’t touch, particularly on controllers that are more than a year old or have been used in dusty environments.
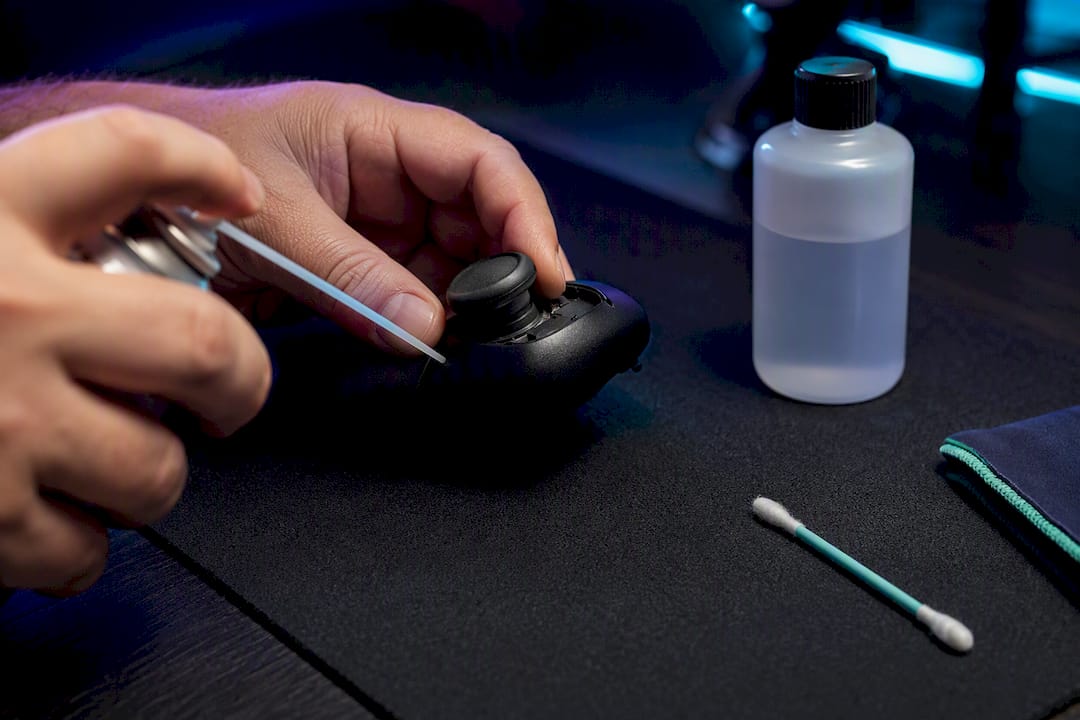
Stick to cleaners built for electronics. Isopropyl alcohol at 90% concentration or higher is the standard choice because it evaporates fast and leaves minimal residue; electronic contact cleaner sprays like CRC QD work for the same reason. Avoid rubbing alcohol below 90%, household cleaners, or anything water-based, since trapped moisture can corrode the tiny contacts inside the stick module.
Here’s the routine:
- Power off the controller completely and disconnect any cable.
- Blast compressed air into the gap around the base of the stick from multiple angles to dislodge loose dust.
- Apply a small amount of isopropyl or contact cleaner directly at the base where the stick meets the housing, not flooding it.
- Rotate the stick through its full range of motion, including diagonals, for about 30 seconds to work the cleaner into the contact points.
- Let it air dry for at least 15 minutes before powering on and re-testing.
Pro Tip: Run the stick through slow, deliberate full circles rather than fast flicks while cleaning. Slow rotation works cleaner into the contact ring more evenly than quick movements do.
Some players swear by an “opposite direction” trick: physically holding the stick against the direction it drifts for a few seconds, which can temporarily reseat worn contacts. It sometimes works, but treat it as a stopgap measure that buys you a session or two, not a repair. If cleaning brings the at-rest reading back to zero but the drift returns within days, you’re looking at worn hardware that cleaning can only mask temporarily, and the next step is module replacement.
Do You Need a Full Module Replacement?
Persistent non-zero readings after a proper cleaning and recalibration are the clearest sign you need a new stick module, not another round of contact cleaner. If the offset returns within a day or two of cleaning, or if it never fully disappeared in the first place, the potentiometer inside the stick has physically worn down and no amount of cleaning fixes that.
You have two module options, and they’re not equivalent:
- Standard potentiometer replacement uses the same resistive-contact technology as the original part, costs less, and is widely available, but it wears down the same way over time since the physical contact mechanism hasn’t changed.
- Hall-effect or TMR module upgrades use magnetic sensors instead of physical contacts, which removes the contact-wear mechanism entirely that causes drift in the first place. These cost more upfront but tend to last significantly longer, and pricing has come down enough by 2026 that they’re a realistic option for most players, not just enthusiasts chasing a premium build.
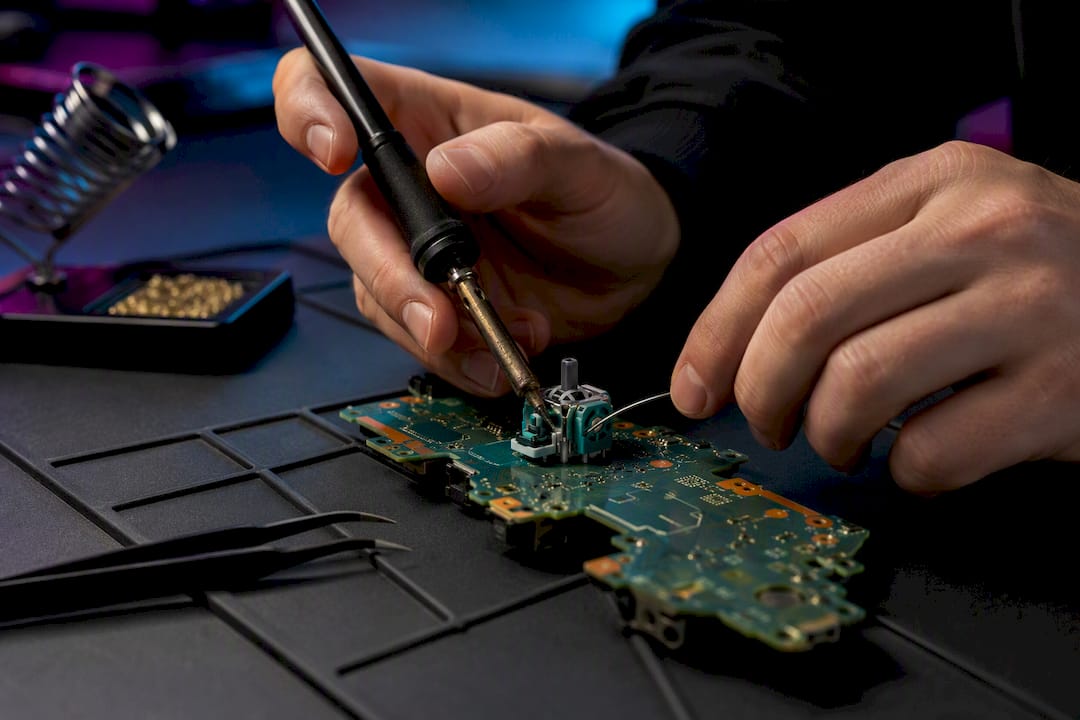
If you’re doing this yourself, you’ll need a set of precision screwdrivers (usually a specific Torx or tri-wing bit depending on the controller), a soldering iron, flux, desoldering braid or a solder sucker, and the replacement module itself. The procedure involves opening the shell, desoldering the old module’s pins from the circuit board, and soldering in the new one, then reassembling and re-testing.
This is where a lot of DIY attempts go wrong. Soldering too long in one spot or applying too much heat can lift the tiny pads off the PCB, which turns a $10 part into a dead controller. A safer approach is to tack a single pin first to hold the module in alignment, then solder the remaining pins with minimal heat and a steady hand. If that sentence made you nervous, it should. This is the step where a professional repair service earns its fee.
Should You Repair, Replace, or Claim Warranty?
The decision tree here is simpler than it looks once you separate warranty status from cost math.
- Check warranty first. If your controller is still covered, manufacturer repair or replacement is the primary route, and opening the shell yourself will void that coverage. Contact the manufacturer before you touch a screwdriver.
- Run the cost math if warranty is expired. Add up parts (a replacement module plus shipping) against the price of a new controller. Standard controllers often run close enough in price to a repair kit that replacement makes more sense for a casual player, while premium and elite controllers with paddles, adjustable tension, or custom triggers justify the repair cost by a wide margin.
- Weigh your time against your budget. DIY repair costs less in dollars but more in hours and risk. A professional repair or replacement decision often comes down to whether the pads lifting during a solder job would cost you more than paying someone who does this daily.
If you’re already eyeing a new console generation or an upgrade, it’s sometimes more practical to put that money toward a new PS5 Pro or Xbox Series X bundle rather than sinking repair costs into an aging standard pad. That’s not the right call for an elite controller with sentimental mods, but it’s worth running the numbers before you commit to a repair.
What Should You Look For in a Repair Service?
Choosing a repair shop or mail-in service comes down to a short list of questions that separate a reliable operation from a gamble.
- Does the repair come with its own warranty, separate from the manufacturer’s, and how long does it last?
- What parts are used: standard potentiometer or Hall-effect/TMR, and is that stated clearly before you pay?
- Is there a diagnostics fee if they find the controller isn’t fixable, and is it disclosed upfront?
- What’s the realistic turnaround time, and does that include shipping both ways?
- Is the shipment insured or trackable, so a lost package isn’t your problem to absorb?
A reputable mail-in service gives you tracking numbers, a written diagnostic report before repair, and a parts receipt when it’s done. Red flags include no repair warranty at all, vague answers about what parts they’re installing, or a price so low paired with a turnaround so slow that it suggests your controller is sitting in a queue behind dozens of others. Some reputable mail-in and in-store repair services offer stated turnaround expectations and transparent service terms, which is worth factoring in if you’d rather not gamble on an unfamiliar shop.
What the Evidence Says About Doing This Right
This guide draws on platform calibration procedures, teardown-based repair guidance, and testing methodology from sources built specifically around measuring and fixing stick drift, not just describing it. The re-test checklist matters more than any single fix: run the at-rest test immediately after any fix, again after 10 minutes of normal use, and once more after a full session. Two clean passes in a row is the strongest signal a fix actually held rather than just appearing to.
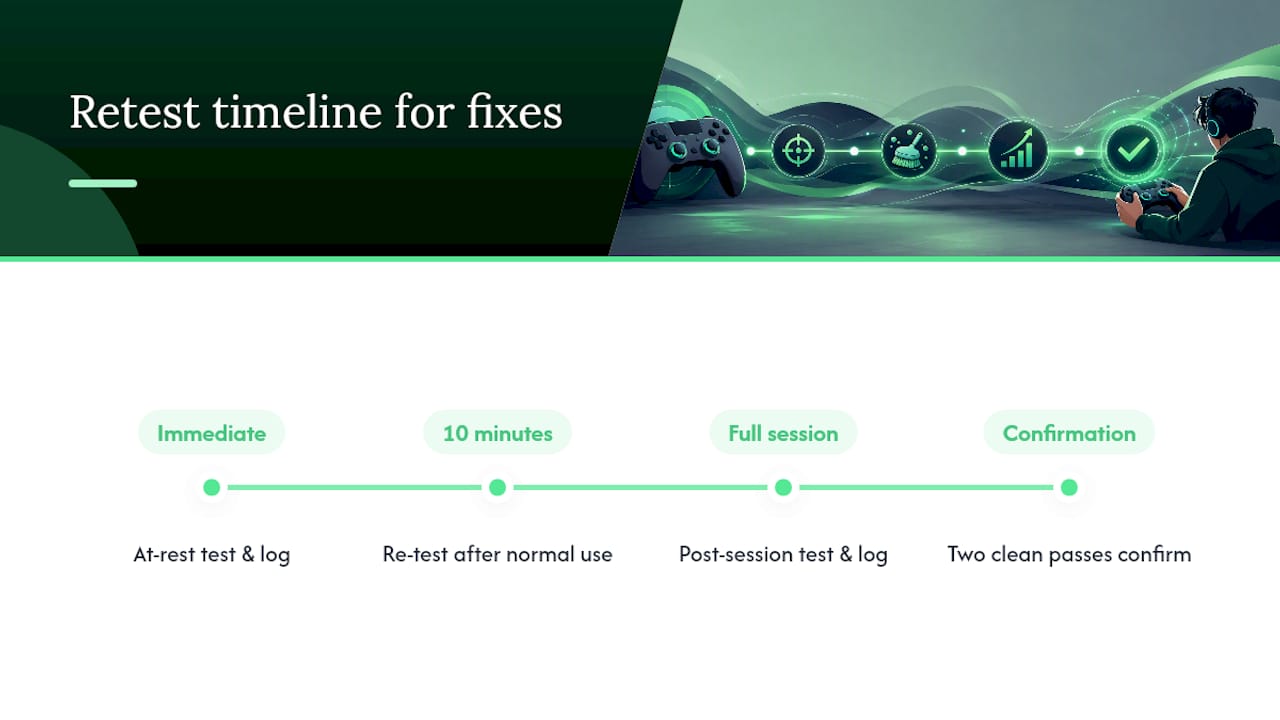
Log the numbers each time. A reading of 0.02 today and 0.03 next week tells you something a memory of “it felt fine” never will.
One safety note that applies regardless of which fix you attempt: opening the controller shell almost always voids any remaining manufacturer warranty, even if the drift itself would have been covered. Check that box before you check anything else.
The Fix Ladder Works, But Most People Skip a Rung
Most drift advice online jumps straight to “clean it or replace the module,” skipping the measurement step entirely. That’s backward. The single biggest mistake I see repeated across forums and comment sections is treating drift as binary, either it’s there or it isn’t, when the real value is in the number. A controller reading 0.04 at rest after cleaning is a different situation than one reading 0.15, even though both would “feel” like drift to most players.
The conventional wisdom also oversells dead zone adjustment as a fix rather than what it actually is: a delay tactic. It’s a legitimate first move, but if you’re widening it every couple of weeks, you’re not managing drift, you’re watching a countdown to hardware failure.
What actually matters is picking the right rung on the ladder for your specific reading, not skipping straight to the most drastic option out of frustration, or stalling on dead zone tweaks out of avoidance. Measure first. Everything else follows from that number.
— Hayden
Get Your Controller Fixed Without the Guesswork
If you’ve run the tests, tried the software fixes, and cleaning didn’t hold, the next move is a professional repair rather than a solder iron and a prayer. Some companies combine hardware sales with on-demand repair and custom tech services in one place, which means you’re not shipping a controller to a stranger with no other footprint.

Consider professional repair services over a DIY module swap when you don’t have the time to source parts and practice soldering, when you want a warranty backing the repair instead of hoping your own work holds, or when you specifically want a Hall-effect upgrade installed correctly the first time. The mail-in repair service covers diagnostics and parts sourcing, with a flat $10 mail-in fee on top of the repair cost. Ship it in, get a diagnostic report back, and skip the risk of lifted PCB pads on a controller you actually care about.
Sources
- How to fix stick drift on PS5, Xbox controllers (Engadget)
- Controller stick drift: complete guide to testing & fixing it (GamepadTools)
- How to fix stick drift on any controller (GamerHardware)
- Fix Stick Drift: PS5, Xbox, Switch, Deck 2026 (Tech Insider)
- Controller stick drift: complete guide to testing & fixing it (JoyCheck)
FAQ
What Causes Controller Drift Besides Normal Wear?
Worn potentiometer contacts from repeated stick movement cause most drift, but design flaws in certain controller models, humidity, dust exposure, and even manufacturing tolerances on the contact ring can accelerate it. Some controller generations are documented as more drift-prone than others due to the specific potentiometer parts used.
How Long Does a Cleaning Fix Typically Last?
A proper cleaning with isopropyl or contact cleaner can permanently resolve drift caused by dust or oxidation, but if the potentiometer itself is worn, the fix may only last days to a few weeks before drift returns. If it comes back quickly, cleaning has masked worn hardware rather than fixed it, and module replacement is the next step.
Is a Hall-Effect Stick Module Worth the Upgrade Cost?
Yes, for anyone who wants a lasting fix rather than a repeat repair. Hall-effect and TMR modules remove the physical contact wear that causes drift in standard potentiometers, and their price has dropped enough by 2026 that the upgrade cost is easy to justify on a controller you plan to keep.
Can I Fix Controller Drift Without Opening the Controller?
Often, yes. Recalibration, firmware updates, dead zone adjustments, and external cleaning at the stick base resolve a large share of drift cases without disassembly. Persistent non-zero at-rest readings after those steps are the signal that internal cleaning or module replacement is needed.
Does Digiwrld Repair Controller Drift?
Digiwrld offers mail-in and in-store repair services with parts sourcing for hardware issues including stick drift. Pricing for controller-specific repairs is available on the service page, and a flat $10 fee applies to mail-in service on top of the repair cost.